概述
在本文中,我们将以深度库即 Mediapipe为基础库,以及其他计算机视觉预处理的CV2库来制作手部地标检测模型。市场上有很多关于这种问题的用例,例如商业相关的虚拟现实、游戏部分的实时体验。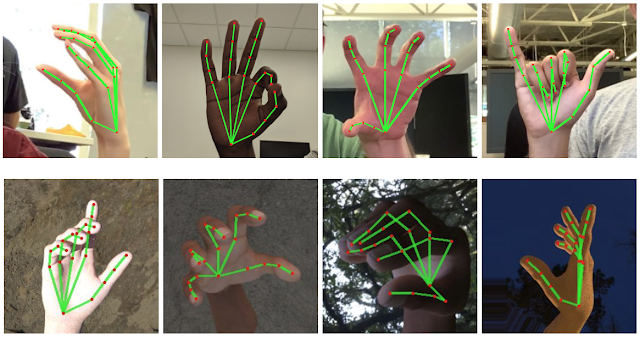
让我们建立我们的手部检测模型
在这里,我们将导入整个管道中需要的所有库。
import cv2import numpy as npimport mediapipe as mpimport matplotlib.pyplot as plt第一步是使用有效参数初始化模型,无论我们采用哪种检测技术,它可以是Mediapipe 或Yolo,初始化模型很重要,遵循相同的原则,我们将遵循所有给定的步骤:
# First step is to initialize the Hands class an store it in a variablemp_hands = mp.solutions.hands # Now second step is to set the hands function which will hold the landmarks pointshands = mp_hands.Hands(static_image_mode=True, max_num_hands=2, min_detection_confidence=0.3) # Last step is to set up the drawing function of hands landmarks on the imagemp_drawing = mp.solutions.drawing_utils代码分解:
到目前为止,我们了解了手模型初始化的结构,现在让我们深入研究函数中使用的参数hands。
最后,我们将使用mp.solutions.drawing_utils,它将负责在输出图像上绘制所有手的地标,这些地标由我们的 Hands 函数检测到。
在这里,我们将首先使用cv2.imread()读取要在其上执行手部检测的图像,并使用matplotlib库来显示该特定输入图像。
# Reading the sample image on which we will perform the detectionsample_img = cv2.imread('media/sample.jpg') # Here we are specifing the size of the figure i.e. 10 -height; 10- width.plt.figure(figsize = [10, 10]) # Here we will display the sample image as the output.plt.title("Sample Image");plt.axis('off');plt.imshow(sample_img[:,:,::-1]);plt.show()输出: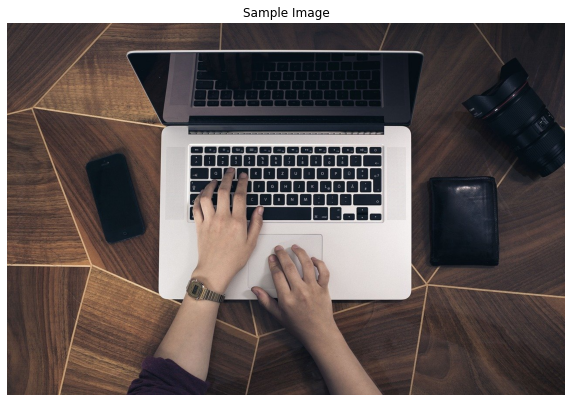
因此,现在我们已经初始化了我们的手部检测模型,下一步将是处理输入图像上的手部地标检测,并使用上述初始化模型在该图像上绘制所有 21 个地标,我们将通过以下步骤。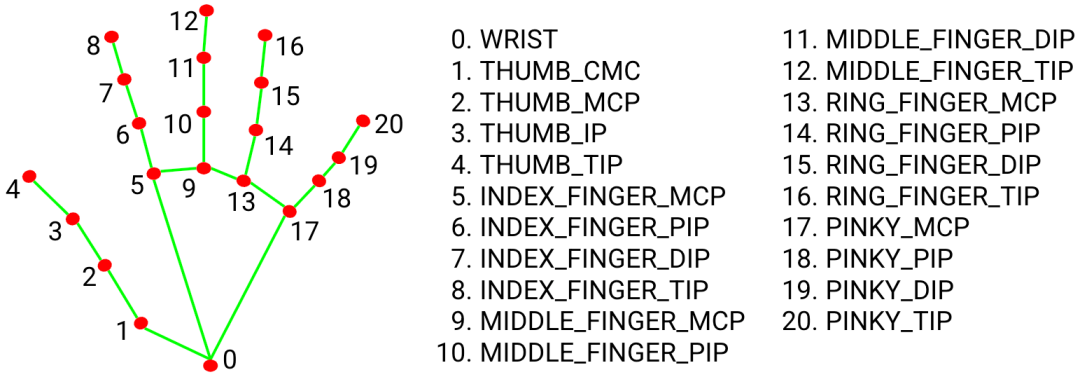
results = hands.process(cv2.cvtColor(sample_img, cv2.COLOR_BGR2RGB)) if results.multi_hand_landmarks: for hand_no, hand_landmarks in enumerate(results.multi_hand_landmarks): print(f'HAND NUMBER: {hand_no+1}') print('-----------------------') for i in range(2): print(f'{mp_hands.HandLandmark(i).name}:') print(f'{hand_landmarks.landmark[mp_hands.HandLandmark(i).value]}')输出: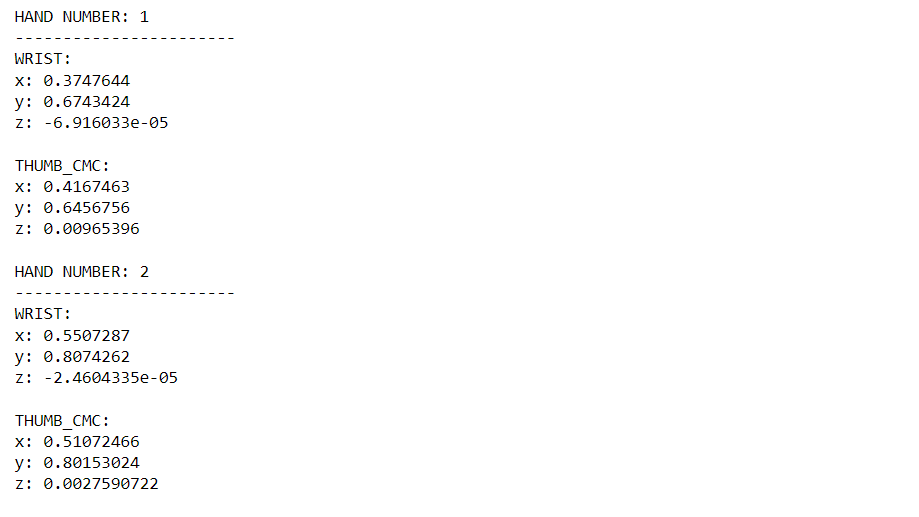
代码分解:
从上面的处理中,我们发现所有检测到的地标都被归一化为通用尺度,但是现在对于用户端,这些缩放点是不相关的,因此我们会将这些地标恢复到原始状态。
image_height, image_width, _ = sample_img.shape if results.multi_hand_landmarks: for hand_no, hand_landmarks in enumerate(results.multi_hand_landmarks): print(f'HAND NUMBER: {hand_no+1}') print('-----------------------') for i in range(2): print(f'{mp_hands.HandLandmark(i).name}:') print(f'x: {hand_landmarks.landmark[mp_hands.HandLandmark(i).value].x * image_width}') print(f'y: {hand_landmarks.landmark[mp_hands.HandLandmark(i).value].y * image_height}') print(f'z: {hand_landmarks.landmark[mp_hands.HandLandmark(i).value].z * image_width}n')输出: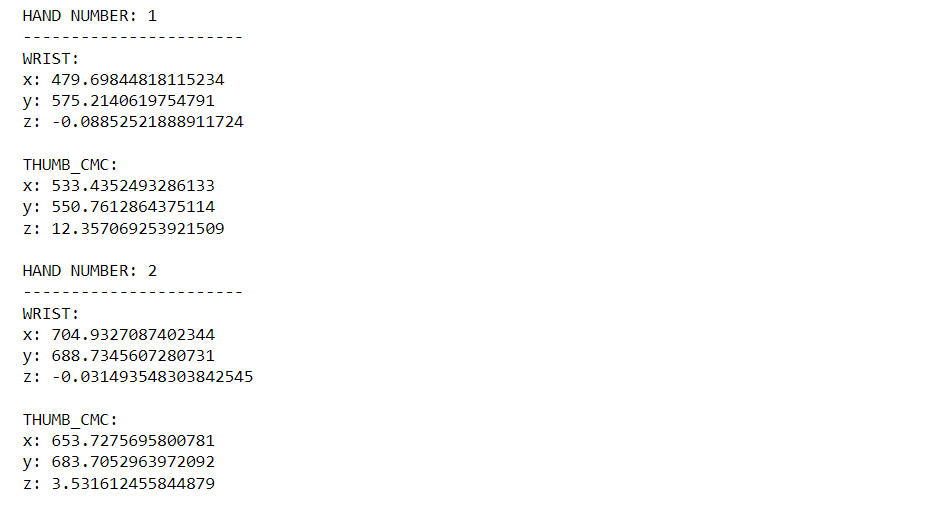
代码分解:
我们只需要在这里执行一个额外的步骤,即我们将从我们定义的示例图像中获得图像的原始宽度和高度,然后所有步骤将与我们之前所做的相同,唯一不同的将是现在地标点没有专门缩放。
由于我们已经从上述预处理中获得了手部地标,现在是时候执行我们的最后一步了,即在图像上绘制点,以便我们可以直观地看到我们的手部地标检测模型是如何执行的。
img_copy = sample_img.copy() if results.multi_hand_landmarks: for hand_no, hand_landmarks in enumerate(results.multi_hand_landmarks): mp_drawing.draw_landmarks(image = img_copy, landmark_list = hand_landmarks, connections = mp_hands.HAND_CONNECTIONS) fig = plt.figure(figsize = [10, 10]) plt.title("Resultant Image");plt.axis('off');plt.imshow(img_copy[:,:,::-1]);plt.show()输出: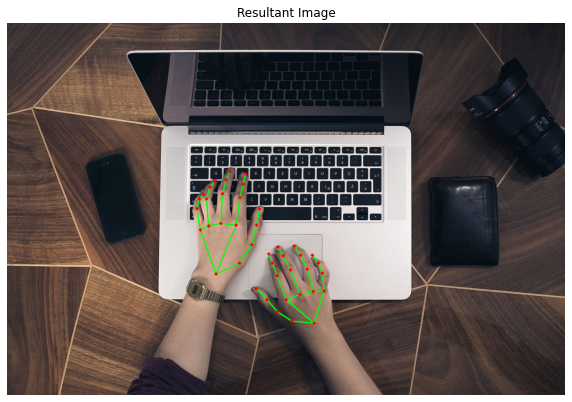
代码分解:
在整个管道中,我们首先初始化模型,然后读取图像,查看输入图像,然后进行预处理。我们缩小了地标点,但这些点与用户无关,因此我们将其恢复到原始状态,最后我们将在图像上绘制地标。
免责声明:本文系网络转载或改编,未找到原创作者,版权归原作者所有。如涉及版权,请联系删