


软件

产品


ImageDataGenerator,循环生成图片,在重复生成图片之前,会把所有图片都遍历一遍。而且如果图片总量不是生成批量的倍数的话,在生成重复图片的前一次的批量是不完整的。具体代码:
import tensorflow as tf
from tensorflow import keras
from tensorflow.keras.preprocessing.image import ImageDataGenerator
import matplotlib.pyplot as plt

datagen = ImageDataGenerator(   #定义生成图片的模式,添加各种变换等,都是在范围内随机
    rotation_range=40,          #图片旋转的范围
    width_shift_range=0.2,      #图片水平位移的范围
    height_shift_range=0.2,     #图片垂直位移的范围
    shear_range=0.2,            #图片变倾斜的角度
    zoom_range=0.2,             #图片缩放的范围
    horizontal_flip=True,       #50%几率水平镜像
    fill_mode='nearest')
gener = datagen.flow_from_directory(        #图片数据生成器
    'D:/Datasets/dogs-vs-cats/train/test',  #生成路径。这个文件夹中应该包括各个类别的图片,且每类图片保存在单独的文件夹中
    target_size = (150,150),                #生成图片的尺寸
    batch_size=1,                           #每次生成多少图片数据
    class_mode='binary')                    #生成图片的标签格式,这里只有两类,所以为二元标签,一个标量0或1
for i,j in gener:#生成的是:图片,标签
    i/=255.
    print(j)
    plt.imshow(i[0])
plt.show() 1.2.3.4.5.6.7.8.9.10.11.12.13.14.15.16.17.18.19.20.21.22.23.pad_sequences,将array中长度不一的list类型的序列转换为长度相同的array。代码示例:
from tensorflow.keras.datasets import imdb
from tensorflow.keras.preprocessing.sequence import pad_sequences

max_feature = 10000
max_len = 500
(data_train,y_train),(data_test,y_test) = imdb.load_data(num_words=max_feature)

x_train = pad_sequences(data_train,maxlen=max_len)
x_test = pad_sequences(data_test,maxlen=max_len)1.2.3.4.5.6.7.8.9.A detailed example of data generators with Keras
使用数据生成器(data generators)解决训练数据内存问题
from keras import models
使用
activation_model = models.Model( inputs = model.input, outputs = model_outputs)
来对原模型生成模型,生成的模型预测样本时能输出原模型对应层的计算结果。model.input是原模型model的输入层,model_outputs是这个模型的某些层,可以使用如:
model_outputs = [l.output for l in model.layers] #返回了原模型的所有层的输出
来定义。然后
activation = activation_model.predict(a_input)
获取某个输入的对应各个层的输出。
查看过滤器训练完成后产生的效果,可以使用该层输出的均值关于输入的梯度来梯度下降,迭代输入的随机图片,使这个均值极小化,然后迭代完成后的图片就是过滤器的效果。具体代码:
#%%
import tensorflow as tf
import keras
import matplotlib.pyplot as plt
import numpy as np
from tensorflow.keras.models import load_model
from keras import backend as K
#%%绘制层过滤器
def produce_img(x):
x -= x.mean()
x /= x.std()+1e-5
x = (x*0.1)+0.5
x = np.clip(x,0,1)
x *= 255
x = np.clip(x,0,255).astype('uint8')
return x
def show_filter(model0,layer_name, filter_index,input_size):
'''model0要看过滤器的模型,layer_index待查看过滤器的层序号,filter_index要查看的过滤器序号
实现的操作主要是keras后端的特性,使用python函数来定义keras函数
'''
layer_output = model0.get_layer(layer_name).output #获取某层输出
loss = K.mean(layer_output[:,:,:,filter_index]) #输出的均值作为梯度下降的损失
grads = K.gradients(loss,model0.input)[0] #计算损失关于输入的梯度,这里仅为函数的定义,并没有计算,后面传入input才开始计算
grads /= K.sqrt(K.mean(K.square(grads)))+1e-5 #梯度标准化
iterate = K.function([model0.input],[loss,grads]) #定义产生梯度和损失的函数,也就是说,输入是model0的输入,输出是上面定义的loss和grads。
#这是keras后端自带的定义函数的函数
input_img = np.random.random((1,input_size,input_size,3))*20+128. #随机一个噪音图片用来迭代
step = 1.0
for i in range(40):
loss_value, grads_value = iterate([input_img])
input_img += grads_value*step
return produce_img(input_img)[0]
#%%以下是显示代码
from keras.applications import VGG16
input_size = 150
model = VGG16(weights='imagenet',include_top = False) #获取模型
model.summary() #查看一下模型各层
max_layer = 4 #要显示的最大层
raw = 8 #图片显示的行数
col = 8 #图片显示的列数
for k in range(max_layer):
show_pic = np.zeros([raw*(input_size+5),col*(input_size+5),3])
for i in range(raw):
for j in range(col):
print('block'+str(k+1)+'_conv'+str(1))
print(i,j)
show_pic[
i*(input_size+5):i*(input_size+5)+input_size,
j*(input_size+5):j*(input_size+5)+input_size,:] = show_filter(model,'block'+str(k+1)+'_conv'+str(1), i*col+j,input_size)
show_pic/=255
plt.imshow(show_pic)
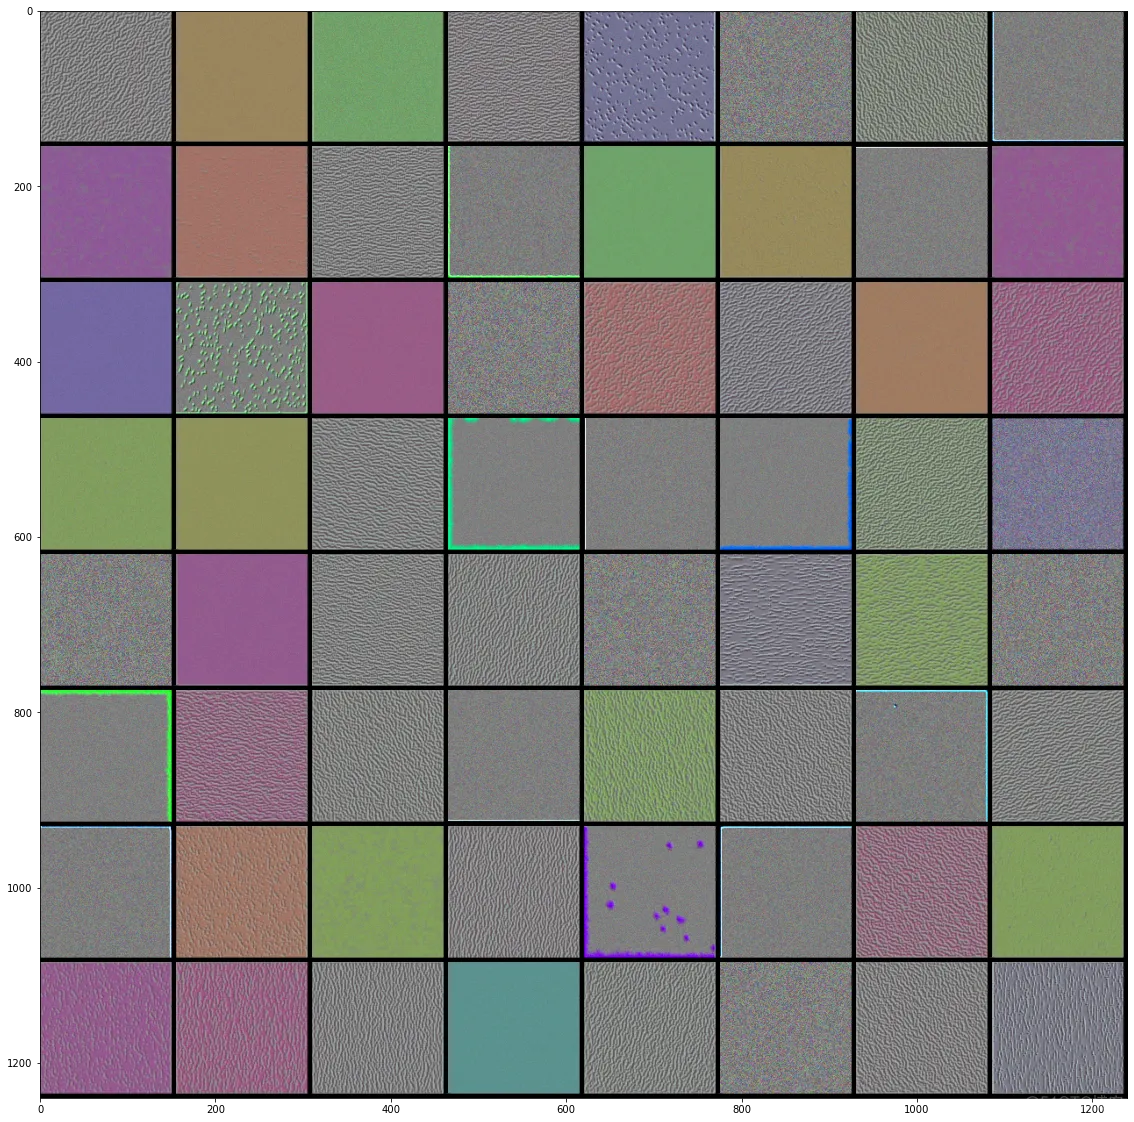
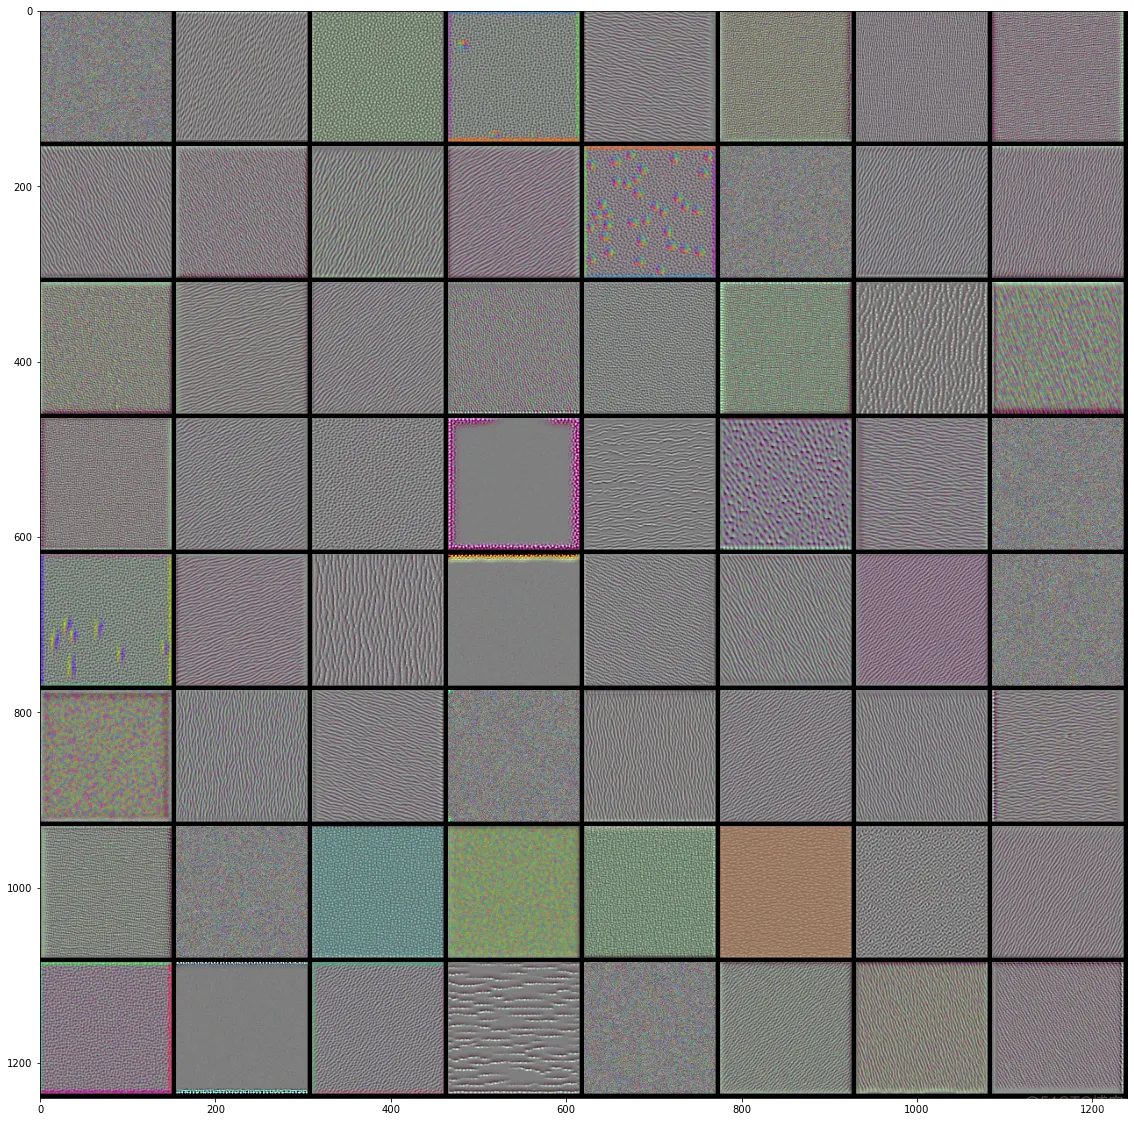
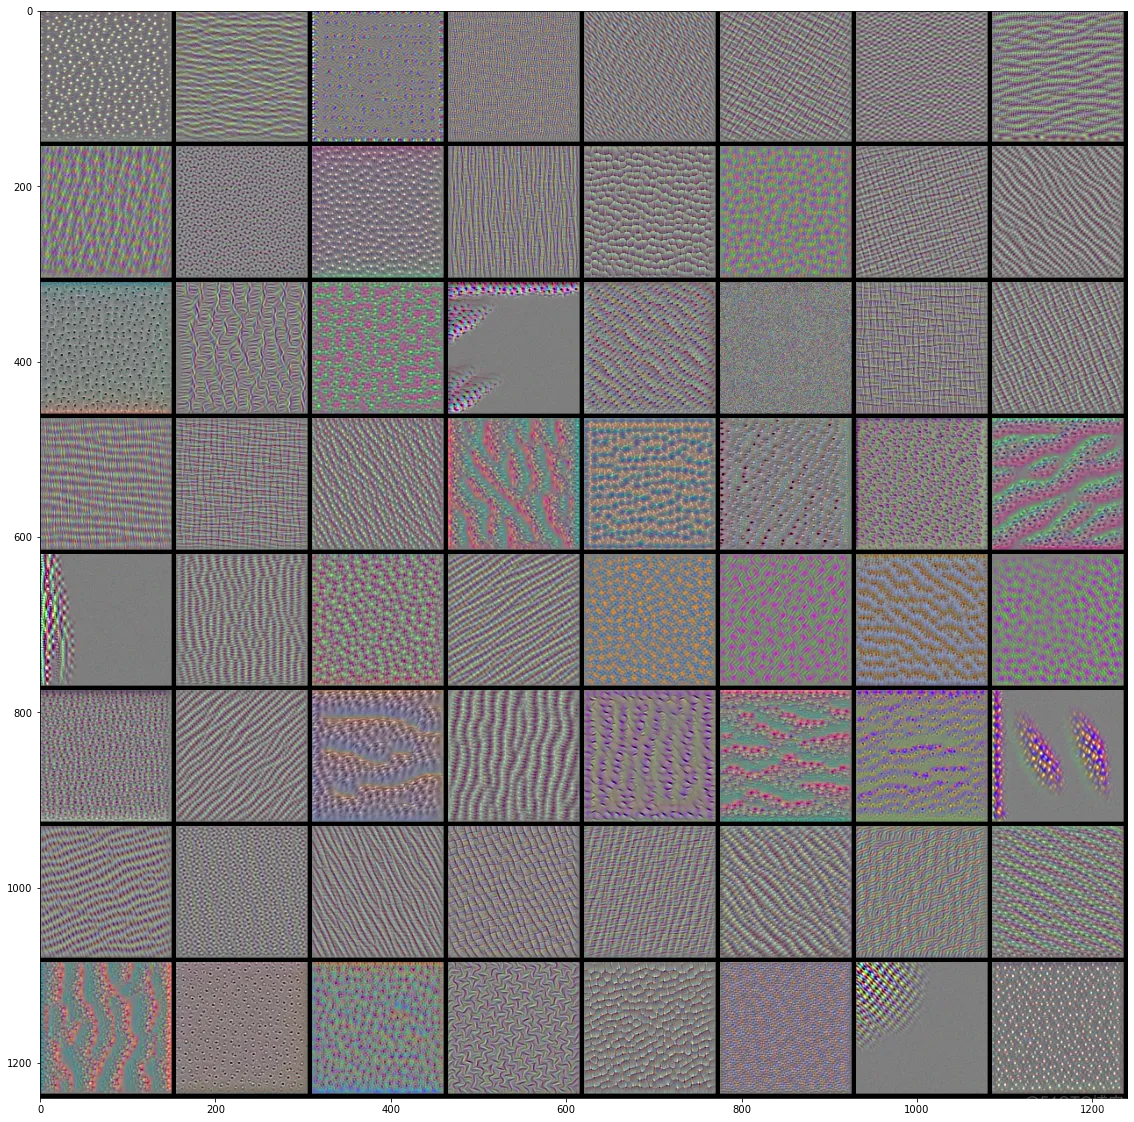
plt.show() 1.2.3.4.5.6.7.8.9.10.11.12.13.14.15.16.17.18.19.20.21.22.23.24.25.26.27.28.29.30.31.32.33.34.35.36.37.38.39.40.41.42.43.44.45.46.47.48.49.50.51.52.53.54.55.VGG16前4层的前64个过滤器的效果图:
 |  |
 |  |
注意!tensorflow在2.0版本之后,默认模式为eager模式,也就是动态图模式(可以直接获取值而不用在迭代中才能获得),而不是之前的静态图模式(计算图完全建立好以后才能开始迭代计算)。在eager模式下不能直接获取梯度加入计算图,会报错,所以要先退出eager模式才能执行上面的代码。也就是在所有tf代码之前加上兼容1.x版本的代码来禁止eager模式(我奇怪禁止eager模式而已为什么要放在兼容性代码里面):
tf.compat.v1.disable_eager_execution() 1.Tensorflow求梯度函数很灵活,对于有多维输入与多维输出(输入与输出都可以是包含多个张量的列表)的张量流,梯度函数会输出所有输入的梯度列表。列表中每个输入的梯度是将输出列表中所有输出元素相加后再对应求得的,因此不必担心会有遗漏。示例如下:
import tensorflow as tf

input1 = tf.Variable([3.,4])
input2 = tf.Variable([9.,5])
w1_1 = tf.constant([[1.,2],[3,4]])
w1_2 = tf.constant([[5.,6],[7,8]])
w2 = tf.constant([[5.,6],[7,8]])
with tf.GradientTape() as tape:
  output1_1 = tf.tensordot(input1, w1_1, axes = 1)
  output1_2 = tf.tensordot(input1, w1_2, axes = 1)
  output2 = tf.tensordot(input2, w2, axes = 1)
grads = tape.gradient([output1_1,output1_2,output2],[input1,input2])
print("Input1: "+str(input1.numpy()))
print("Weight1_1:\n",w1_1.numpy())
print("Weight1_2:\n",w1_2.numpy())
print("Output1: "+str(output1_1.numpy()))
print("Output2: "+str(output1_2.numpy()))
print("Input1的梯度: "+str(grads[0].numpy()))

print("\nInput2: "+str(input2.numpy()))
print("Weight2:\n",w2.numpy())
print("Output2: "+str(output2.numpy()))
print("Input2的梯度: "+str(grads[1].numpy())) 1.2.3.4.5.6.7.8.9.10.11.12.13.14.15.16.17.18.19.20.21.22.23.
输出如下:
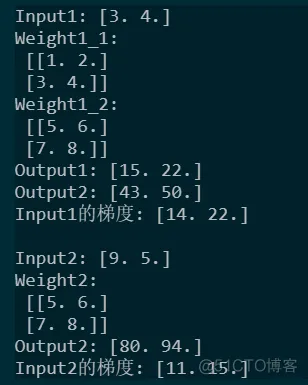
Input1的梯度中:
14 = 1+2+5+6
22 = 3+4+7+8
但是,需要注意的是,对于多输出且输出规模不同的某个输入来说,直接默认让TF对输出元素进行简单求和可能会出现权重不均的问题。比如输出a为$[None,1]$,输出b为$[None,100]$。如果我们不对这两个输出进行别的操作的话,TF会把它们的所有元素都加在一起再求梯度,这会导致输出a相对于输出b的权重比是$1:100$,梯度下降时就可能会出现a的loss不降反增的情况。你可以想象一下,b只要让所有元素各变小一点点,就能将抵消a巨大的增加,结果总体的损失依然是下降的,也就是说a的话语权在其中是很小的。为了防止这种情况,我们最好让a和b都通过tf.reduce_mean()求平均值,然后再相加,这样就让二者的权重相等了。
当然,以上描述的是在多输出有共享模型参数的情况下,如果所有输出都是输入通过不同的权重求得的,也就是说这些输出都是独立运算的,那么对简单相加得到的损失进行的梯度下降依然会使每个部分的损失都减小。
Pytorch
对于添加了对数的loss,如果在取对数之前为负值,loss值为nan,但是依然可以反向传播,反向传播的导数是这个负值的倒数。验证代码如下:
import numpy as np
import torch
from torch import optim
import matplotlib.pyplot as plt


whis = []
wghis = []
for i in np.arange(0.1,10.,0.001):
  w = torch.tensor(-i,requires_grad=True)
  torch.log(w).backward()
  # print(w,w.grad)
  whis.append(w.detach().cpu())
  wghis.append(w.grad.detach().cpu())
whis, wghis = np.array(whis), np.array(wghis)
print(wghis)
plt.plot(whis,wghis)
plt.plot(-whis,1/whis)
plt.show()1.2.3.4.5.6.7.8.9.10.11.12.13.14.15.16.17.18.19.
画出示意图如下:
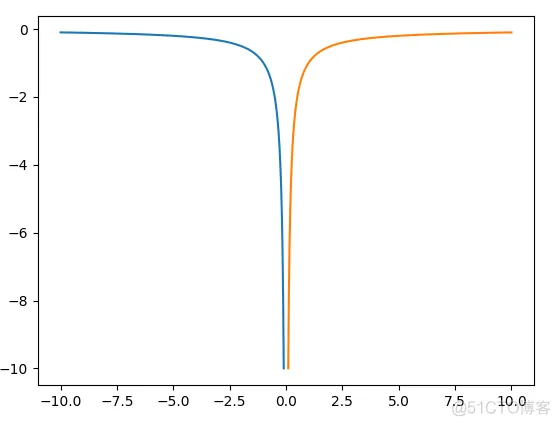
左边是负值对数的导函数,右边是函数$y = -1/x$,形状镜像一致。
模型各层的参数可以以字典的形式传入,在字典中修改各个参数的优化超参数,比如学习率、动量等等。示例代码如下:
 1 #%%
 2 from torch import nn,optim
 3
 4 class test(nn.Module):
 5   def __init__(self):
 6     super().__init__()
 7     self.layer1 = nn.Linear(1,2)
 8     self.layer2 = nn.Linear(2,3)
 9     self.layer3 = nn.Linear(3,1)
10     self.layer4 = nn.Linear(1,3)
11     paras = [
12       {'params':self.layer1.parameters(),'lr':111,'momentum':0.2},
13       {'params':self.layer2.parameters(),'lr':222},
14       {'params':self.layer3.parameters()},
15       {'params':self.layer4.parameters()},
16     ]
17     opt = optim.SGD(paras,10) #没在字典中定义的将在这里统一定义
18     for i in opt.param_groups:
19       print(i)
20       print('\n')
21
22 model = test()1.2.3.4.5.6.7.8.9.10.11.12.13.14.15.16.17.18.19.20.21.22.尽管是很简单的操作,然而pytorch没给实现。可以用numpy的shuffle来打乱序号,然后用这个乱的序号对torch.tensor重新索引,示例代码如下:
import torch
import numpy as np

a = torch.tensor([1,2,3,4,5])
r = np.array(range(len(a)))
np.random.shuffle(r)
a = a[r]
print(a)1.2.3.4.5.6.7.8.
需要注意的是,np.random.shuffle并不返回值,它对变量本身进行操作。
Pytorch优化器动量(Momentum)的实现和一些早期论文中描述的不同,pytorch的动量是这样实现的:
\begin{aligned} v_{t+1} & = m v_{t} + g_{t+1}, \\ p_{t+1} & = p_{t} - l v_{t+1}, \end{aligned}
其中$v,m,l,g,p$分别表示速度、动量参数、学习率、梯度、参数权重值。而早期论文通常是这样实现的:
\begin{aligned} v_{t+1} & = m v_{t} + lg_{t+1}, \\ p_{t+1} & = p_{t} - v_{t+1}, \end{aligned}
如果有实验结果上的不同,问题可能出现在这里。
Pytorch中如果要显式广播一个数据,可以用expand或repeat,repeat会对数据本身进行复制,expand则是对数据的索引进行复制,因此repeat会比expand慢。如果你想在广播后,对一个值的修改会同时修改相应的其它广播值,则用expand,否则用repeat。另外,梯度的传播则是相同的。
根据以上介绍,我们可以知道,同时对expand的广播值进行不同的操作会出错。实验如下:
import torch

img = torch.zeros([1])
ex_img = img.expand([2])
ex_img += torch.tensor([100,100])
 1.2.3.4.5.6.
广播后的两个值指向同一个数据,因此同时给它们做加法是不行的。
免责声明:本文系网络转载或改编,未找到原创作者,版权归原作者所有。如涉及版权,请联系删
武汉格发信息技术有限公司,格发许可优化管理系统可以帮你评估贵公司软件许可的真实需求,再低成本合规性管理软件许可,帮助贵司提高软件投资回报率,为软件采购、使用提供科学决策依据。支持的软件有: CAD,CAE,PDM,PLM,Catia,Ugnx, AutoCAD, Pro/E, Solidworks 等。
 技术文档
技术文档
 推荐好文
推荐好文


 155-2731-8020


