


软件

产品


一 人脸识别基本概念
二 工具和环境安装准备
1. 安装CMake
2. 安装dlib
3. 安装scikit- image
三 人脸识别实践 (人脸识别与比较)
1. 实验准备
2. 识别逻辑简述
3. 具体代码
4. 运行与结果
四 人脸识别实践二 (特征点描绘)
1. face_detector.py
2. face_landmark_detection.py
一 人脸识别基本概念
基本概念先说明下,人脸检测解决的问题是确定一张图上有木有人脸,而人脸识别解决的问题是这个脸是谁的。可以说人脸检测是是人识别的前期工作。下面要做的是人脸识别。
要实现人脸识别,人脸对齐(face alignment)是基本的算法,目前主要的算法有ERT、SDM、LBF等,其中由于dlib开源库实现了ERT算法,效果不错,这里使用dlib,并通过python来实现。
用Dlib来实现人脸识别,它已经替我们做好了绝大部分的工作,我们只需要去调用就行了。Dlib里面有人脸检测器,有训练好的人脸关键点检测器,也有训练好的人脸识别模型。这里主要记录实现过程,不分析细节原理。可以到官网查看源码以及实现的参考文献。
具体算法后面有时间要研究下。
另,这篇文章推荐找来看看:浙大一篇毕业论文 一种基于随机森林的实时人脸关键点定位实现.docx
二 工具和环境安装准备
CMake
Dlib
scikit-image
以上是正确的安装流程。如果先安装Dlib,会报如下错误:(截取最后几行):

1. 安装CMake
下载 链接 https://cmake.org/download/

用的windows机器,直接双击安装,注意:安装完了一定要设置path变量中CMake的路径。
2. DLIB下载安装
(下载链接二解包后有全套说明手册再docs目录,推荐!!!)
下载链接一:https://github.com/davisking/dlib

下载后保存:

或下载链接二:如下

执行 python setup.py install 成功。

3. 安装 scikit-image
pip install scikit-image
三 人脸识别实践
1. 实验准备
所有需要的文件及目录如下:
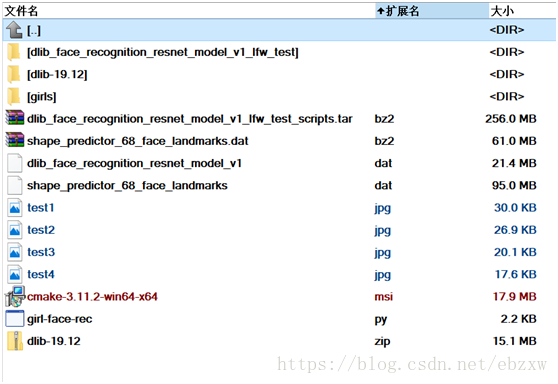
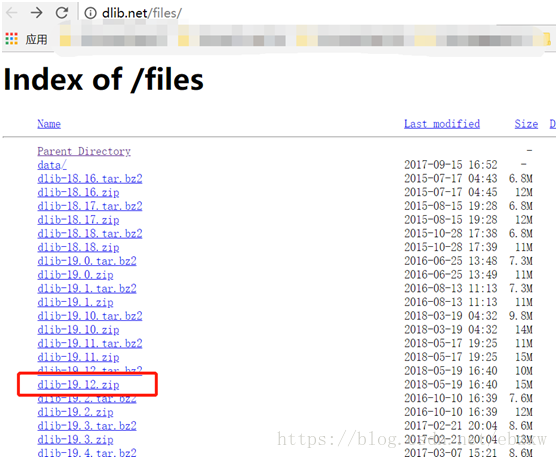
所有文件都可以在以下网址下载:http://dlib.net/files/。然后准备几个人的人脸图片作为候选人脸,最好是正脸。放到girls文件夹中。
这里,shape_predictor_68_face_landmarks.dat是已经训练好的人脸关键点检测器。dlib_face_recognition_resnet_model_v1.dat是训练好的ResNet人脸识别模型。(说明:ResNet是何凯明在微软的时候提出的深度残差网络,获得了 ImageNet 2015 冠军,通过让网络对残差进行学习,在深度和精度上做到了比 CNN 更加强大。)
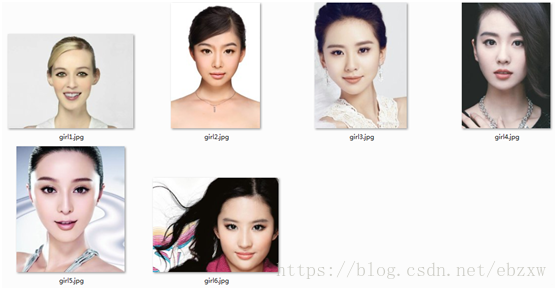
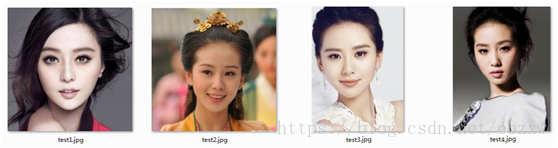
六个候选人特征图片放在girls文件夹中,然后需要识别的人脸图片test1.jpg、test2.jpg、test3.jpg、test4.jpg。下面工作就是检测到test*.jpg中的人脸,然后判断她到底是候选人中的谁。girl-face-rec.py是实现人脸识别的python脚本。
六个候选人特征如下:

四个待测试人脸如下:
2. 识别逻辑简述
以上数据准备完毕。识别的大致流程是这样的:
1)先对候选人进行人脸检测、关键点提取、描述子生成后,把候选人描述子保存起来。
2)然后对测试人脸进行人脸检测、关键点提取、描述子生成。
3)最后求测试图像人脸描述子和候选人脸描述子之间的欧氏距离,距离最小者判定为同一个人。
3. 具体代码
# -*- coding: UTF-8 -*-import sys,os,dlib,glob,numpyfrom skimage import io if len(sys.argv) != 5: print('请检查参数是否正确') exit()# 1.人脸关键点检测器predictor_path = sys.argv[1]# 2.人脸识别模型face_rec_model_path = sys.argv[2]# 3.候选人脸文件夹faces_folder_path = sys.argv[3]# 4.需识别的人脸img_path = sys.argv[4] # 1.加载正脸检测器detector = dlib.get_frontal_face_detector()# 2.加载人脸关键点检测器sp = dlib.shape_predictor(predictor_path)# 3. 加载人脸识别模型facerec = dlib.face_recognition_model_v1(face_rec_model_path) # win = dlib.image_window()# 候选人脸描述子listdescriptors = []# 对文件夹下的每一个人脸进行:# 1.人脸检测# 2.关键点检测# 3.描述子提取 for f in glob.glob(os.path.join(faces_folder_path, "*.jpg")): print("Processing file: {}".format(f)) img = io.imread(f) #win.clear_overlay() #win.set_image(img) # 1.人脸检测 dets = detector(img, 1) print("Number of faces detected: {}".format(len(dets))) for k, d in enumerate(dets): # 2.关键点检测 shape = sp(img, d) # 画出人脸区域和和关键点 # win.clear_overlay() # win.add_overlay(d) # win.add_overlay(shape) # 3.描述子提取,128D向量 face_descriptor = facerec.compute_face_descriptor(img, shape) # 转换为numpy array v = numpy.array(face_descriptor) descriptors.append(v) # 对需识别人脸进行同样处理# 提取描述子,不再注释img = io.imread(img_path)dets = detector(img, 1)dist = []for k, d in enumerate(dets): shape = sp(img, d) face_descriptor = facerec.compute_face_descriptor(img, shape) d_test = numpy.array(face_descriptor) # 计算欧式距离 for i in descriptors: dist_ = numpy.linalg.norm(i-d_test) dist.append(dist_) # 候选人名单candidate = ['Unknown1','Unknown2','Shishi','Unknown4','Bingbing','Feifei']# 候选人和距离组成一个dictc_d = dict(zip(candidate,dist))cd_sorted = sorted(c_d.items(), key=lambda d:d[1])print('\n The person is: %s' % ( cd_sorted[0][0] ) ) dlib.hit_enter_to_continue() 4. 运行与结果
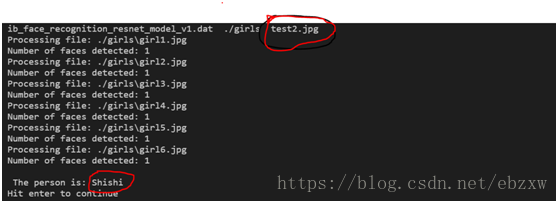
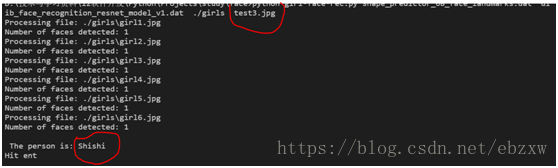
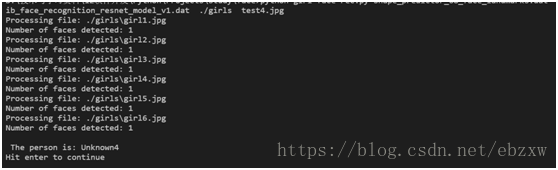
执行命令:python girl-face-rec.py shape_predictor_68_face_landmarks.dat dlib_face_recognition_resnet_model_v1.dat ./girls test1.jpg
运行结果如下:(识别出test1.jpg 是girls5.jpg ... 前面三个都正确)

四 人脸识别实践二
在官网上下载的包里有python的sample代码,介绍了如何使用dlib进行人脸识别。
下面实践两个: 代码分析如下,具体分析见代码注释:
1. face_detetor.py
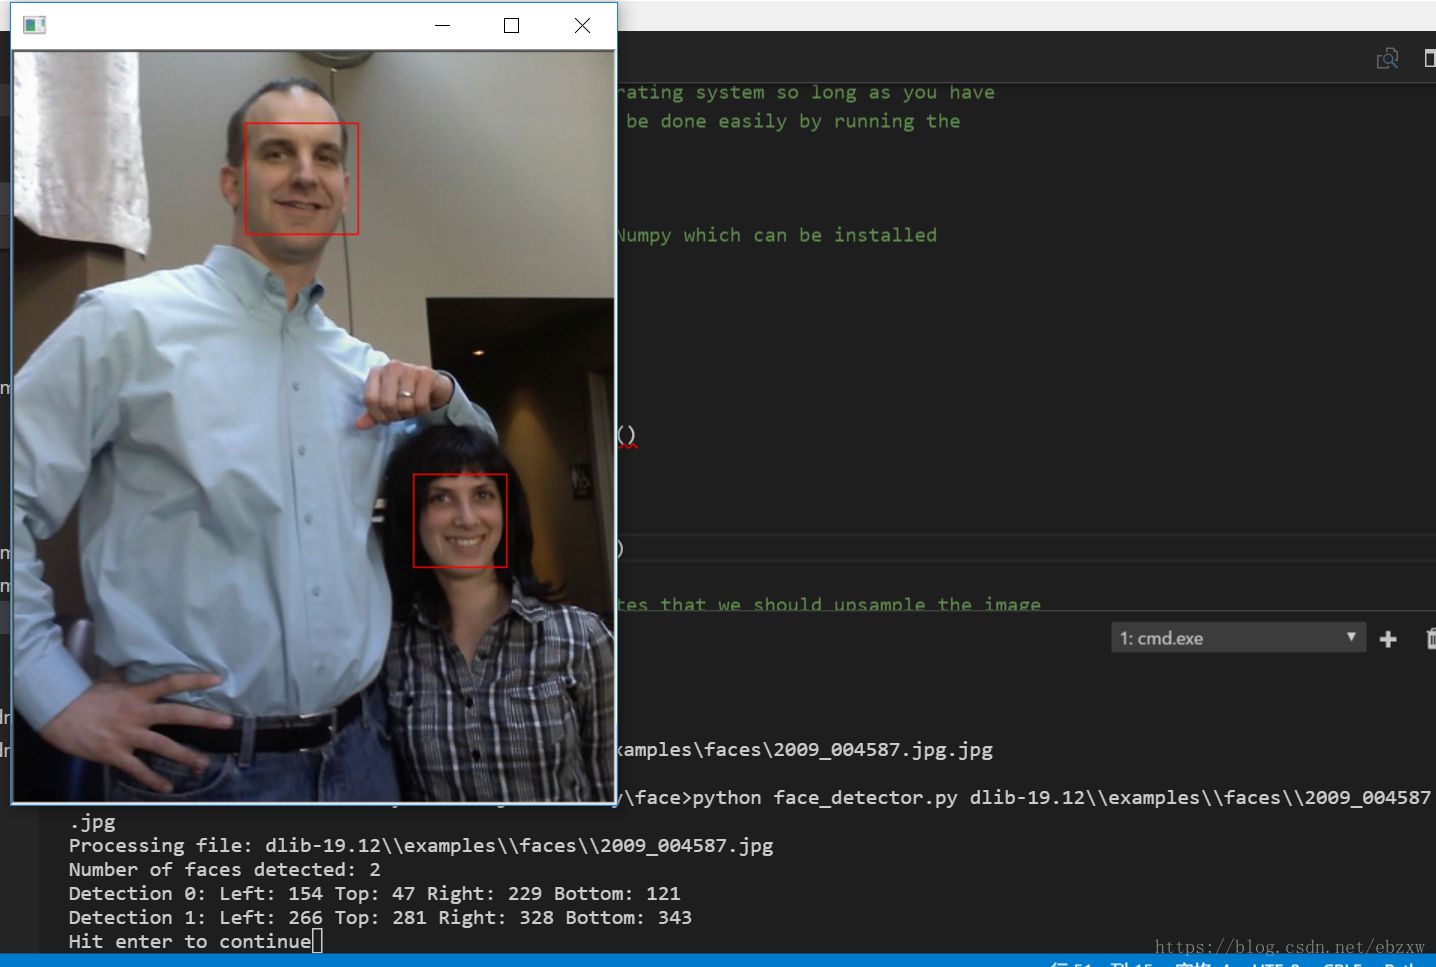
face_detetor.py 识别出图片文件中一张或多张人脸,并用矩形框框出标识出人脸;
## face_detetor.pyimport sysimport dlib detector = dlib.get_frontal_face_detector()win = dlib.image_window() for f in sys.argv[1:]: print("Processing file: {}".format(f)) img = dlib.load_rgb_image(f) # The 1 in the second argument indicates that we should upsample the image # 1 time. This will make everything bigger and allow us to detect more # faces. dets = detector(img, 1) print("Number of faces detected: {}".format(len(dets))) for i, d in enumerate(dets): print("Detection {}: Left: {} Top: {} Right: {} Bottom: {}".format( i, d.left(), d.top(), d.right(), d.bottom())) win.clear_overlay() win.set_image(img) win.add_overlay(dets) dlib.hit_enter_to_continue()# Finally, if you really want to you can ask the detector to tell you the score# for each detection. The score is bigger for more confident detections.# The third argument to run is an optional adjustment to the detection threshold,# where a negative value will return more detections and a positive value fewer.# Also, the idx tells you which of the face sub-detectors matched. This can be# used to broadly identify faces in different orientations.if (len(sys.argv[1:]) > 0): img = dlib.load_rgb_image(sys.argv[1]) dets, scores, idx = detector.run(img, 1, -1) for i, d in enumerate(dets): print("Detection {}, score: {}, face_type:{}".format( d, scores[i], idx[i])) 注释与分析:
## face_detetor_1.py 比原来代码略有改动import dlibfrom skimage import io # 使用特征提取器frontal_face_detectordetector = dlib.get_frontal_face_detector() # path是图片所在路径path = "d:\\code\\python\\face\\pic"img = io.imread(path+"1.jpg") # 特征提取器的实例化dets = detector(img) print("人脸数:", len(dets)) # 输出人脸矩形的四个坐标点for i, d in enumerate(dets): print("第", i, "个人脸d的坐标:", "left:", d.left(), "right:", d.right(), "top:", d.top(), "bottom:", d.bottom()) # 绘制图片win = dlib.image_window()# 清除覆盖#win.clear_overlay()win.set_image(img)# 将生成的矩阵覆盖上win.add_overlay(dets)# 保持图像dlib.hit_enter_to_continue()执行与结果:
1)python face_detector.py dlib-19.12\\ examples \\faces\\2009_004587.jpg
2 ) python face_detector.py test1.jpg

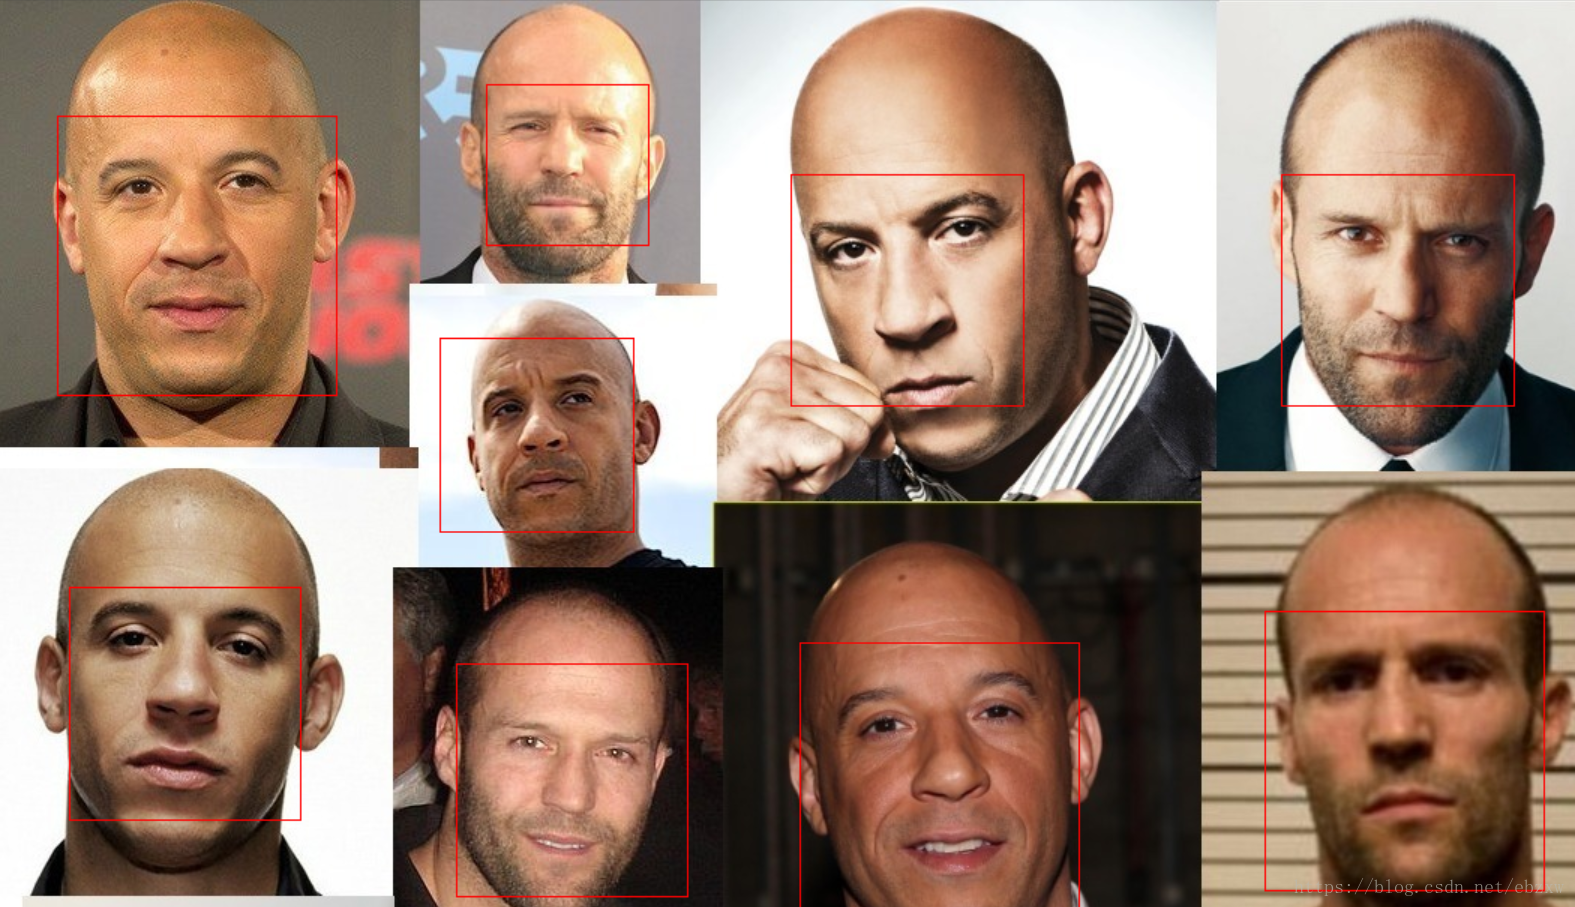
3) python face_detector.py dlib-19.12\\examples\\faces\\bald_guys.jpg
2. face_landmark_detection.py
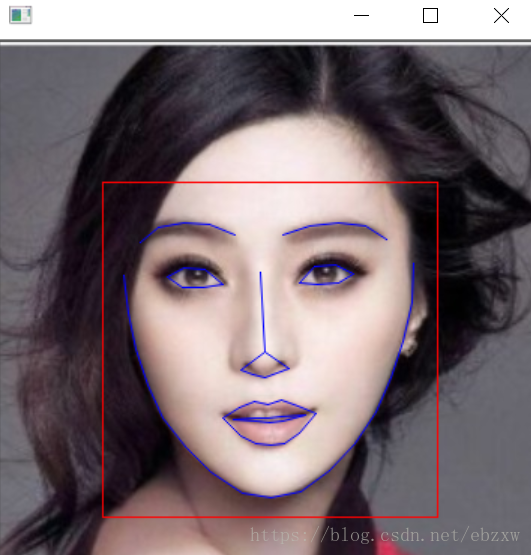
在face_detector.py的识别人脸基础上,识别出人脸部的具体特征部位:下巴轮廓、眉毛、眼睛、嘴巴,同样用标记标识出面部特征;
import sysimport osimport dlibimport glob if len(sys.argv) != 3: print( "Give the path to the trained shape predictor model as the first " "argument and then the directory containing the facial images.\n" "For example, if you are in the python_examples folder then " "execute this program by running:\n" " ./face_landmark_detection.py shape_predictor_68_face_landmarks.dat ../examples/faces\n" "You can download a trained facial shape predictor from:\n" " http://dlib.net/files/shape_predictor_68_face_landmarks.dat.bz2") exit() predictor_path = sys.argv[1]faces_folder_path = sys.argv[2] # 图片所在路径 detector = dlib.get_frontal_face_detector() # 使用特征提取器frontal_face_detectorpredictor = dlib.shape_predictor(predictor_path) # dlib的68点模型win = dlib.image_window() # 生成dlib的图像窗口 for f in glob.glob(os.path.join(faces_folder_path, "*.jpg")): print("Processing file: {}".format(f)) img = dlib.load_rgb_image(f) win.clear_overlay() win.set_image(img) # Ask the detector to find the bounding boxes of each face. The 1 in the # second argument indicates that we should upsample the image 1 time. This # will make everything bigger and allow us to detect more faces. dets = detector(img, 1) # 特征提取器的实例化 print("Number of faces detected: {}".format(len(dets))) for k, d in enumerate(dets): print("Detection {}: Left: {} Top: {} Right: {} Bottom: {}".format( k, d.left(), d.top(), d.right(), d.bottom())) # Get the landmarks/parts for the face in box d. shape = predictor(img, d) # 利用预测器预测 print("Part 0: {}, Part 1: {} ...".format(shape.part(0), shape.part(1))) # Draw the face landmarks on the screen. win.add_overlay(shape) # 绘制面部轮廓 win.add_overlay(dets) # 绘制矩阵轮廓 dlib.hit_enter_to_continue() # 保持图像执行与结果:
1)python face_landmark_detection.py shape_predictor_68_face_landmarks.dat .
2)python face_landmark_detection.py shape_predictor_68_face_landmarks.dat girls\\multigirls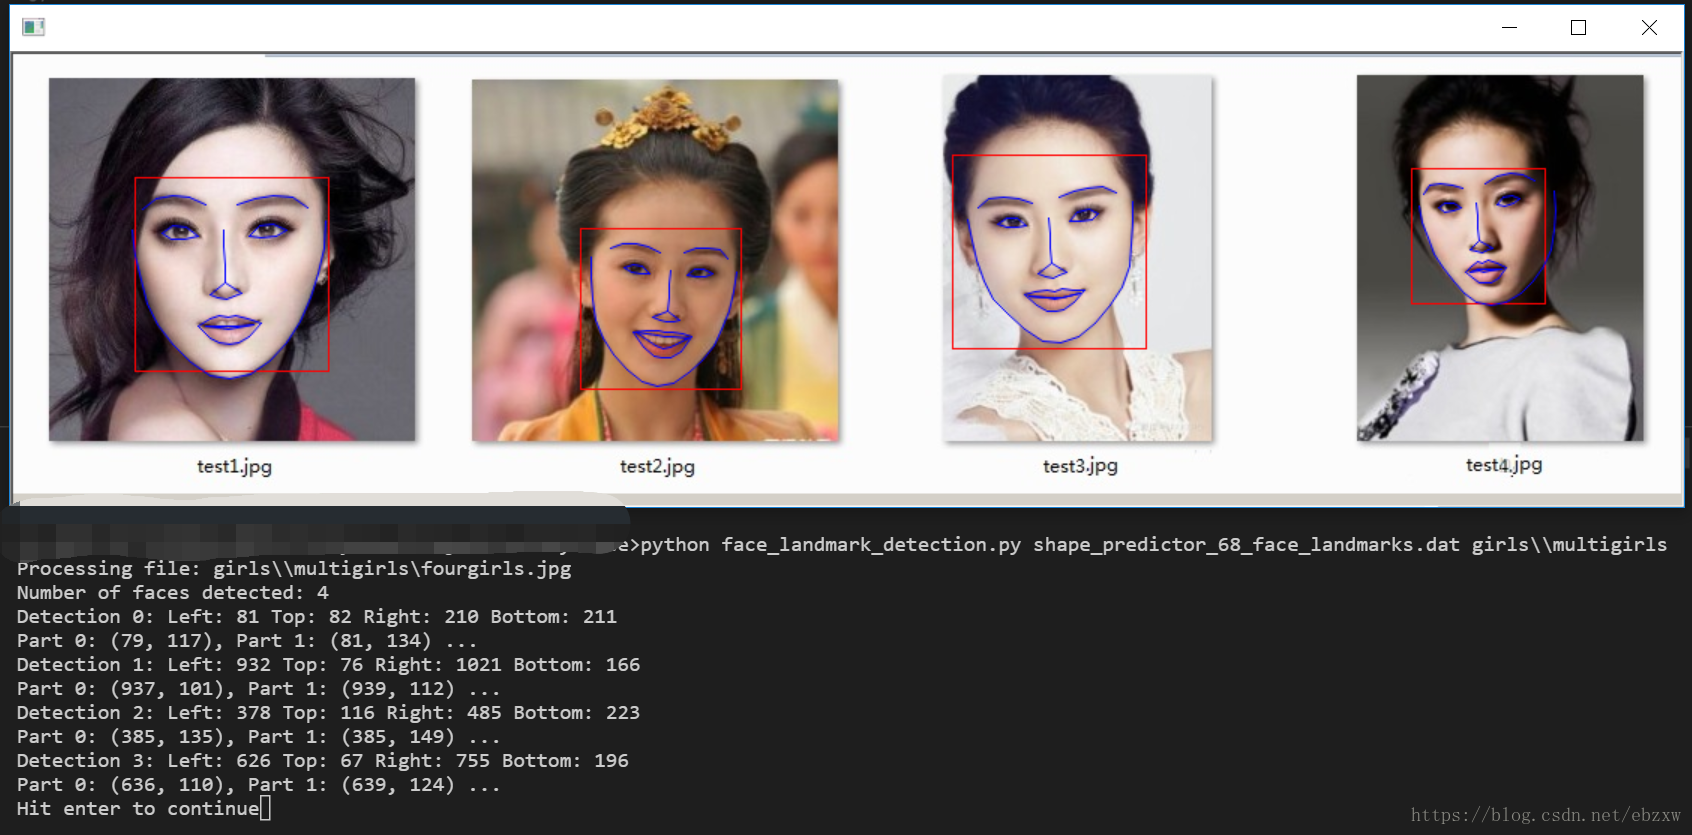
免责声明:本文系网络转载或改编,未找到原创作者,版权归原作者所有。如涉及版权,请联系删
 技术文档
技术文档
 推荐好文
推荐好文


 155-2731-8020


